Kawaii Shark ita bag pin layout template tutorial December 31, 2019 00:00
From Jess:
I've been meaning to do this for months, so I thought it would be fitting to end the year on a productive note!
I want to share with you my preferred method for creating ita bag inserts to use as pin layouts in the Kawaii Shark ita bag -- in this case, I use large sheets of stiffened felt (which you can buy on Amazon), and I trace the pink "pinsert" that ships with all Kawaii Shark ita bags as my guide to creating an accurate shape.
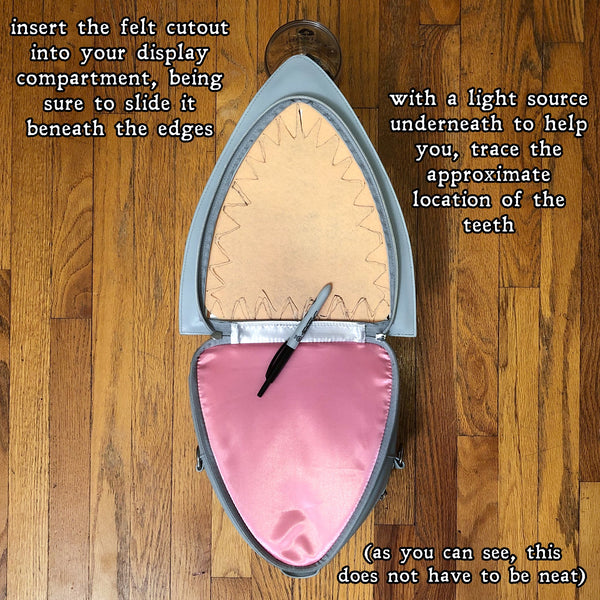
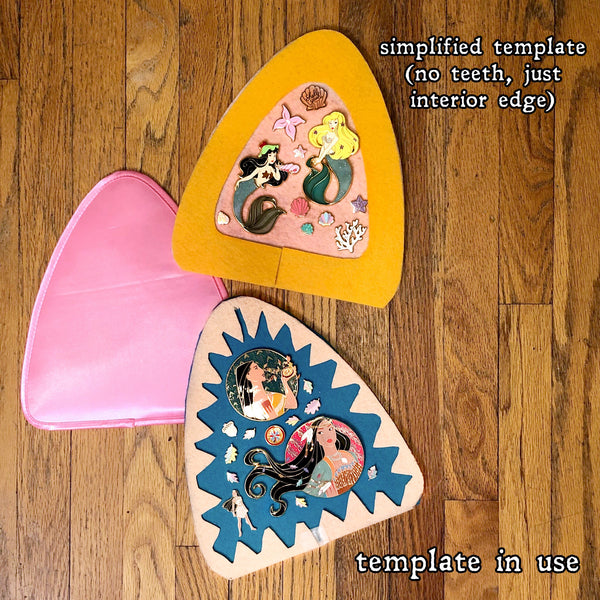
But what if, like me, you're really picky about your pin layout and you don't want any of your enamel trinkets being blocked by the display window's edges or the shark's cute teeth? You can take it a step further by choosing a light-colored sheet of stiffened felt (one that you don't intend to ever use as a layout; I decided on this rather gross flesh tone) and cutting out where the teeth and edges of the window are. That way, you can lay that template on top of your felt inserts to have a decent idea of the best spots to place your pins.
Please enjoy this poorly color-balanced series of photos explaining how to make your own template:


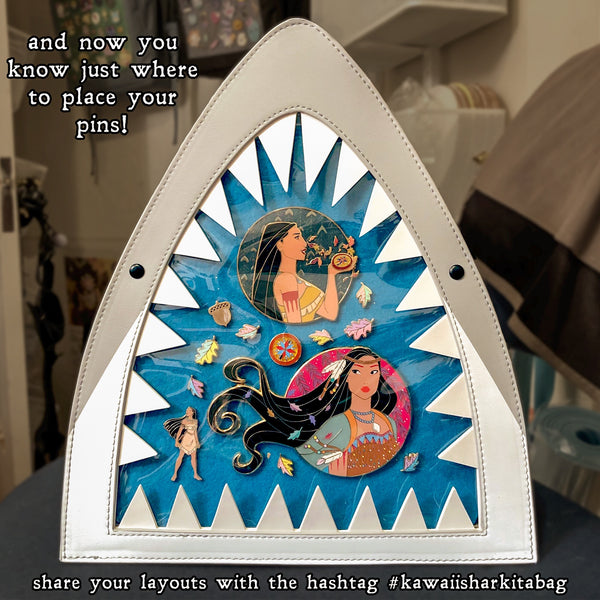
Did that make sense? Did you find it helpful? Do you now have intricately-planned pin layouts that you want to show off? Please share them with us by using the hashtag #kawaiisharkitabag, and/or tagging @rescuesirens/@pinsofsteele on Instagram!
See you in 2020, buoys and gills!
I've been meaning to do this for months, so I thought it would be fitting to end the year on a productive note!
I want to share with you my preferred method for creating ita bag inserts to use as pin layouts in the Kawaii Shark ita bag -- in this case, I use large sheets of stiffened felt (which you can buy on Amazon), and I trace the pink "pinsert" that ships with all Kawaii Shark ita bags as my guide to creating an accurate shape.
But what if, like me, you're really picky about your pin layout and you don't want any of your enamel trinkets being blocked by the display window's edges or the shark's cute teeth? You can take it a step further by choosing a light-colored sheet of stiffened felt (one that you don't intend to ever use as a layout; I decided on this rather gross flesh tone) and cutting out where the teeth and edges of the window are. That way, you can lay that template on top of your felt inserts to have a decent idea of the best spots to place your pins.
Please enjoy this poorly color-balanced series of photos explaining how to make your own template:


Did that make sense? Did you find it helpful? Do you now have intricately-planned pin layouts that you want to show off? Please share them with us by using the hashtag #kawaiisharkitabag, and/or tagging @rescuesirens/@pinsofsteele on Instagram!
See you in 2020, buoys and gills!