News
Kawaii Shark Ita Bag and New Enamel Pins May 27, 2019 10:30
From Jess:My husband Chris and I have been itching to get into the enamel pin game for years. Before he met me, Chris had an enamel pin produced of Ogo, the main character from his webcomic "Kiskaloo" (around 2009 or 2010?); then, in 2012, we had four different pins made based on some of Chris's cute pin-up drawings. We didn't really know the first thing about pins, though, and we weren't super stoked with the results, so we've never sold any of those.
In 2017, we decided to finally try again with our Chibi Rescue Sirens pins: five adorable, extra-cartoony pins of each Rescue Siren, along with the series emblem.
By late 2018, I wanted to get more involved and level up our pin game. I teamed up with Kellee Riley, one of our wonderful "Rescue Sirens" artists and a great friend, and I learned all about the ins and outs of enamel pin design and production. (If you want amazing mermaid pins, they really don't get better than Kellee's, available in her Etsy shop.) Once I was semi-capable of adapting artwork into pins myself, I was off to the races! I've been cranking out new pin designs ever since, which we'll be debuting this July at San Diego Comic-Con.
First up, though, is this gorgeous 2" Nim pin, which Kellee adapted flawlessly from her own artwork and I had produced:
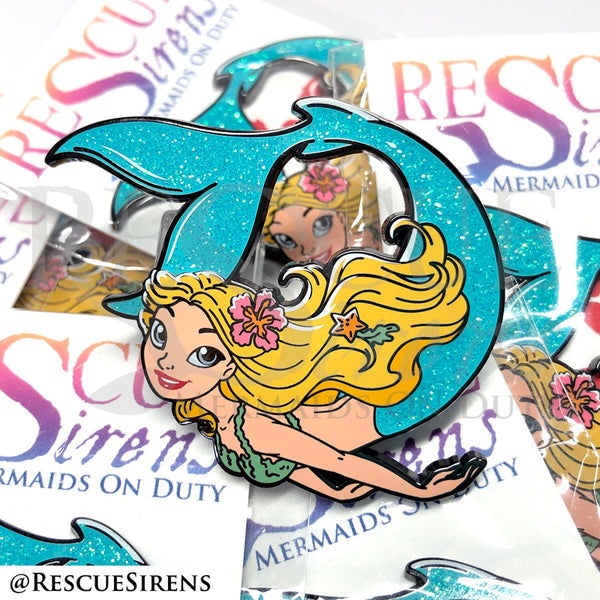
Isn't it stunning? I can't stop staring at it!
The really awesome part: Kellee currently has a limited number of Nim pins for sale in her Etsy shop, so you can buy one RIGHT NOW! Please go throw money at her if you can; I'm so grateful to Kellee for being my "pin pal," and she deserves all the success in the world. (Not only because she's a wonderful person, but also because that means she can keep making pins! Mwahaha! I need my KelleeArt fix.)
In addition to our Nim pin, I'm crossing my fingers that I'll have a Kelby pin finished and in-hand by SDCC, too. I've adapted Kellee's artwork for Kelby and the rest of the Sirens, and I'm currently deciding on the best pin manufacturing home for them that's capable of faithfully producing each design (glitter, screenprinting, and all).
In the meantime, though, I have a sneak peek (read: factory photos) of two sets of pins that any ocean enthusiast or mermaid fan will want, whether that's to fill empty spaces in their pin boards or simply to add a little flair to a jacket lapel or hat (or whatever else you feel comfortable poking holes in, really).
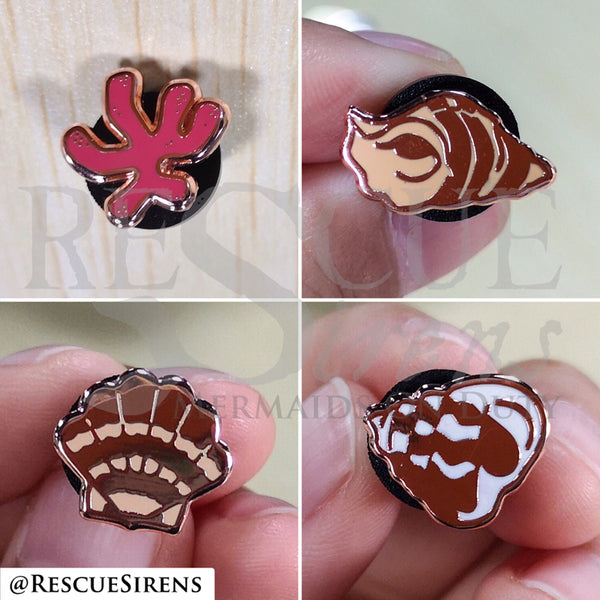
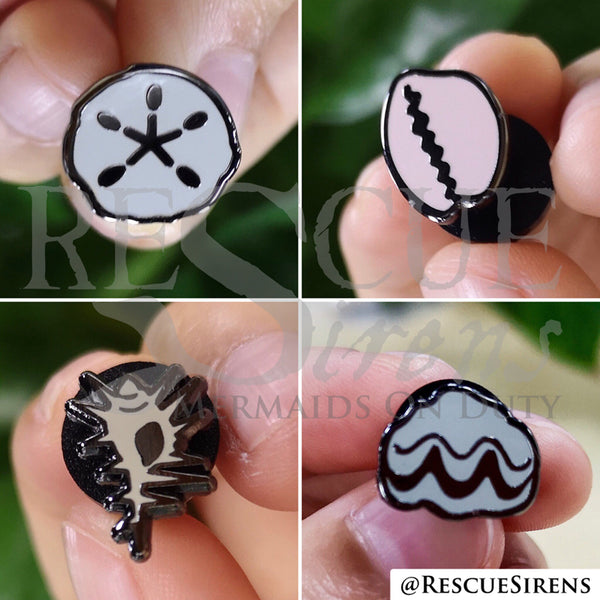
These itty-bitty 0.5" filler pins are inspired by the cute seashells and coral you can find on the beach in one of my favorite video games, "Animal Crossing." I love shell-shaped filler pins and use them all the time in my pin layouts, so I wanted to make my own set (including more than just your traditional scallops). This is the result!
But that's not my biggest pin-related news this month.
Have you heard of ita bags? An ita bag (which can take the form of a purse, a backpack, or a convertible combination of the two) has a main compartment for holding your items (phone, wallet, etc.) as well as a secondary compartment, which features a clear vinyl window. Within this compartment, you can display enamel pins, embroidered patches, pinback buttons, photographs -- whatever your heart desires!
Ita bags have their origins in Japan, and they're quickly gaining popularity across the world. There are a lot of really appealing ita bag designs out there (and I own several!), but the type of bag that I wanted most didn't exist, so... I made it.
Meet the Kawaii Shark ita bag, by Rescue Sirens.

I'm so proud of it! I designed it from scratch, and it's everything I'd hoped for in an ita bag. What you see here is the first sample bag that I received from my manufacturer, with a revised sample waiting to be photographed (I added an interior label and altered the tooth position a tiny -- and I mean tiny -- bit). The front of the bag (the display compartment) is about 12" tall by 10.5" wide at its base, and the shorter main storage compartment behind that is about 4" deep, giving you plenty of room for both your pins and your daily essentials.
How do you display your pins, you ask? While Kawaii Shark comes with a removable pink satin "pillow" to stick your pins to...

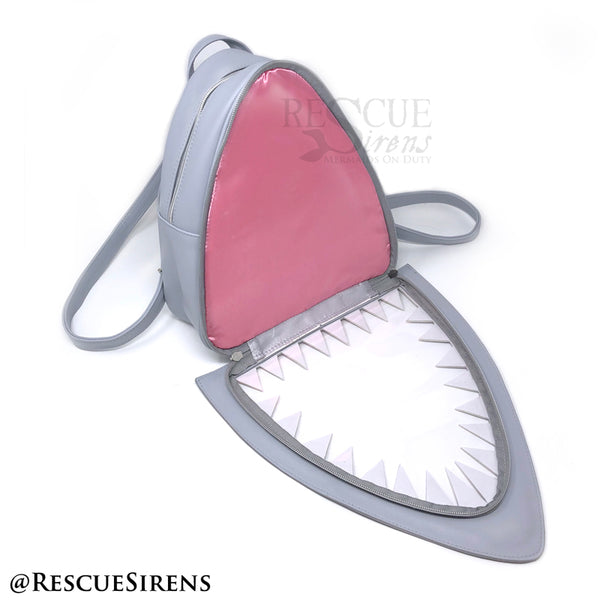
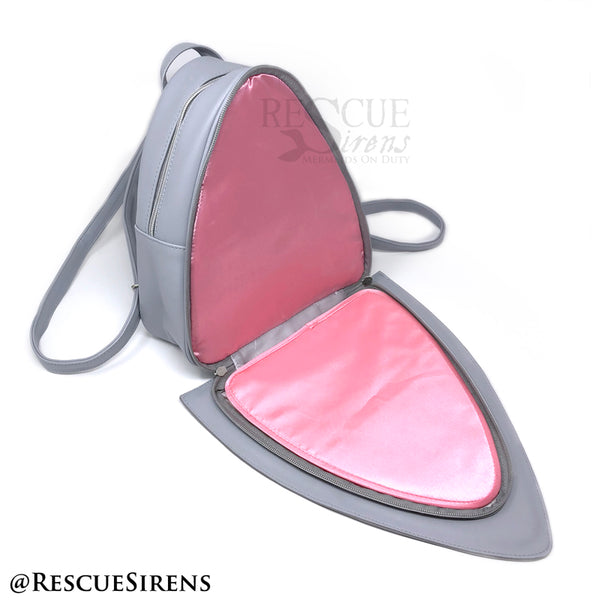
...I highly suggest using the pillow as a cutting guide and creating your own ita bag inserts using stiff felt. That's what I've been doing, and it works like a charm! I'll probably write a blog post next month demonstrating that and recommending my favorite felt, and showing off some of my favorite pin layouts displayed inside the bag.
Once I nail down overall costs and decide on a retail price, my plan is to open up pre-sales in the "Rescue Sirens" Etsy shop. Pre-sales will be offered at a discount in thanks for being awesome and ordering early, and that will pay for the cost of mass production. Once the bags are produced and shipped here, I'll send them out to people who pre-ordered them, and then I'll sell the rest of them at the standard price. I expect the entire process to take about two months from the time mass production begins, assuming everything goes swimmingly.
Sharks are such a passion of mine, and shark conservation is a big part of "Rescue Sirens," so I thought this would be the perfect bag to display Rescue Siren pins, Kellee Riley's mermaid pins, ocean-related pins, or anything else you can dream up. (I just made a "Jurassic Park" pin layout a couple of nights ago!) I can't wait to share this with all of you, and see what you come up with to display in your ita bag!
If you're not doing so already, please follow us on Instagram for updates, and/or sign up for our mailing list to learn when our ita bag pre-sales go live (and for more information on when our pins are available).
- Previous
- Page 2 of 2
